User Management System
The user management system in gradient fox allows you to assign fine-grained access privileges to all resources within your Apache Kafka® environment. The following are the main constituents
of the gradient fox permissioning system.
- Users - Represents a person who can log into the gradient fox Web UI. Users are assigned to groups.
- Groups - Collection of system and/or resource privileges.
Typically maps to a specific role within your organization, representing a set of responsibilities and tasks that are assigned to persons occupying that role.
- System Permissions - High-level permissions that grant wide access to sensitive information. Should only be granted to trusted administrators.
- Resource Permissions - Permissions that grant access specific resources within your environment. Allow you to fine-tune the access to only resources
that are needed in a certain role.
Adding Users
You can add new users by clicking on the Add-button on the users page. The Add User-dialog below will be shown after clicking on the button.
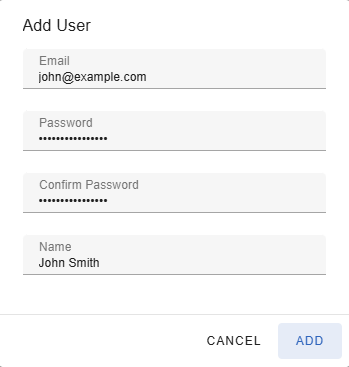
In the Add User-dialog you need to enter a unique email address for the new user as well as the user's name which does not have to be unique.
Additionally you must provide a password that must be between 8 and 30 characters in length and contain upper- and lowercase letters and at least one number.
You must confirm the password by entering it again in the Confirm Password-field.
Adding Groups
A new group can be added on the Groups-page by clicking on the Add-button. This will be bring up the Add Group-dialog shown below.
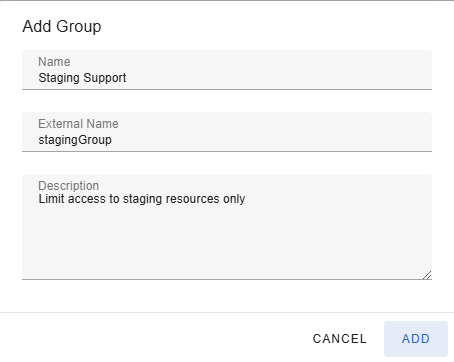
In the dialog box, you are required to provide a unique name for the new group, ensuring it is not already in use.
Additionally, you have the option to include a brief description for the group, which can provide further context or details about its purpose or function.
This description is optional but can be helpful for clarity and reference.
If you are integrating with an external SSO provider, you can specify the name(s) of the external groups in the 'External Name' field.
See the Single Sign-On section for more details.
Assigning Groups to Users
Groups can be assigned to users under the Groups-tab of the user details page. Even though users can have no groups assigned to them, it would make a little sense as the user would not be able to perform
any actions in the gradient fox web console.
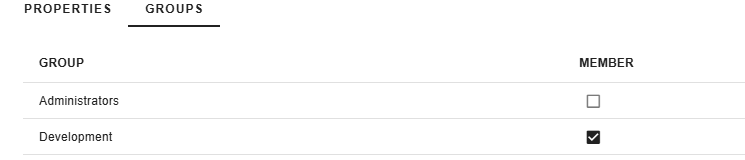
Alternatively, you can also assign users to a group under the Members-tab of the group detail page. Notice that you must always have at least one active user in the built-in Administratos group.
By default that user is the user that gets created when gradient fox is started for the first time, and you do the initial registration.
System Permissions
Under the System Permissions-tab of the group details page, you can assign system-level permissions to the selected group. These permissions allow
one to view and update sensitive data so great care should be taken when assigning groups with these permissions to end users.
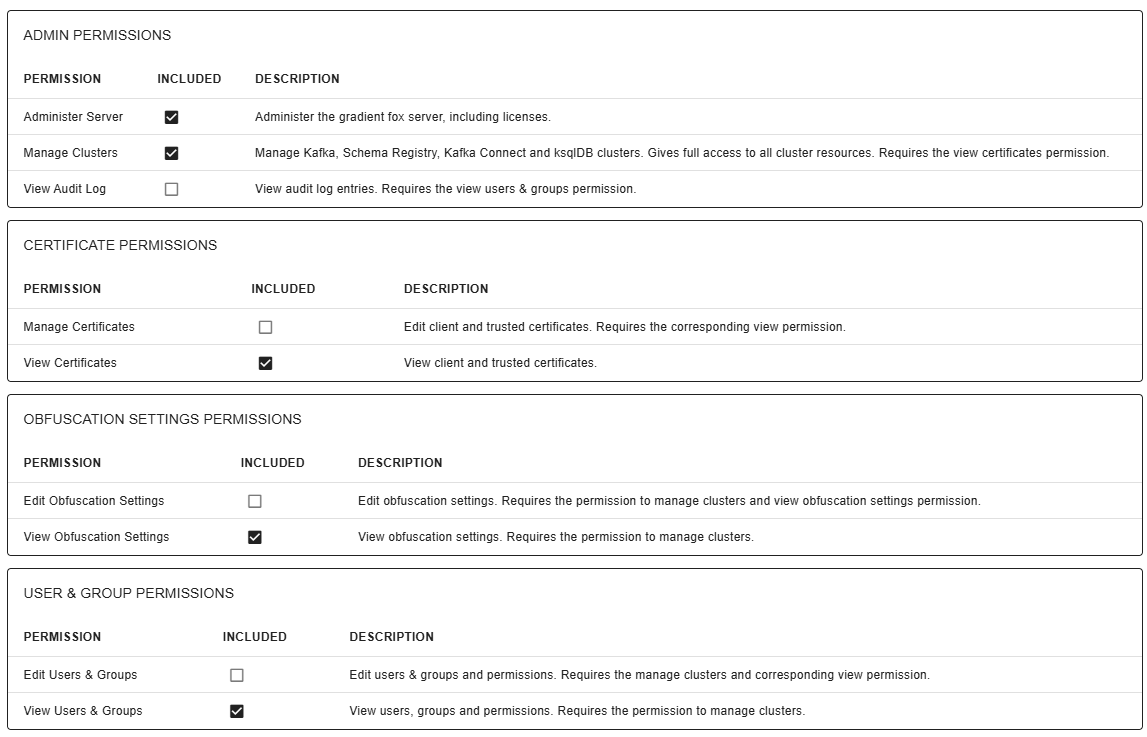
Below is a brief description of each available permission on this page.
- Administer server - Administer gradient fox server settings and options thru the Web UI, including the licensing and email configuration information.
- Manage Clusters - This permission permits full view and edit access to all Apache Kafka®, Schema Registry, Kafka Connect and ksqlDB servers in the system.
This includes access to all sub-objects (e.g. topics and consumer groups) of these servers.
The View Certificates permission is also required if this permission is enabled.
Notice that this permission is needed for one to be able to add new Kafka, Schema Registry, Kafka Connect or ksqlDB clusters.
- View Audit Log - View all available audit log entries. The View Users & Groups permission is also required if this permission is enabled.
- Manage Certificates - View and manage client and trusted certificates. The corresponding view permission is also required if this option is enabled.
- View Certificates - View client and trusted certificates. The actual certificates or keys cannot be viewed.
- Edit Obfuscation Settings - View and manage obfuscation settings. The manage clusters and corresponding view permission are also required if this option is enabled.
- View Obfuscation Settings - View obfuscation settings. The manage clusters permission is also required if this option is enabled.
- Edit Users & Groups - View and edit users, groups and their permissions. The manage clusters and corresponding view permission are also required if this option is enabled.
- View Users & Groups - View users, groups and their permissions. The manage clusters permission is also required if this option is enabled.
Resource Permissions
The resource permissions screen allows you to grant fine-grained access to various resources withing your Kafka ecosystem. The screen is divided into several categories
for ease of use.
- Cluster Permissions - Permissons needed to view and manage Apache Kafka® clusters.
Notice that to be able to add new Kafka clusters one will need the "Manage Clusters" system permission.
- Topic Permissions - Permissons needed to view and manage Kafka topics.
Notice that to be able to view topics one will also need the "View" permission under "Cluster Permissions" for the same cluster.
- Consumer Permissions - Permissons needed to view and manage consumer groups.
Notice that to be able to view consumer groups one will also need the "View" permission under "Cluster Permissions" for the same cluster.
- Schema Registry Permissions - Permissons needed to view and manage Schema Registry clusters and subjects.
Notice that to be able to add new Schema Registries one will need the "Manage Clusters" system permission.
- Kafka Connect Permissions - Permissons needed to view and manage Kafka Connect clusters and connectors.
Notice that to be able to add new Kafka Connect clusters one will need the "Manage Clusters" system permission.
- ksqklDB Permissions - Permissons needed to view and manage ksqlDB clusters.
Notice that to be able to add new ksqlDB clusters one will need the "Manage Clusters" system permission.

Obfuscation Settings
Under the Obfuscation-tab you can exclude certain obfuscation groups from applying to this user group. All users of this group will be excluded
from that specific obfuscation and will see that topic data unmasked. You can simply select the obfuscation groups you do not want to apply to this
user group by checking the Excluded-checkbox and clicking on the update button.
Notice that since changing these settings allow users to see unmasked data, great consideration should be taken when excluding any obfuscation groups.